User management
User management
Updated March 12, 2026
Overview
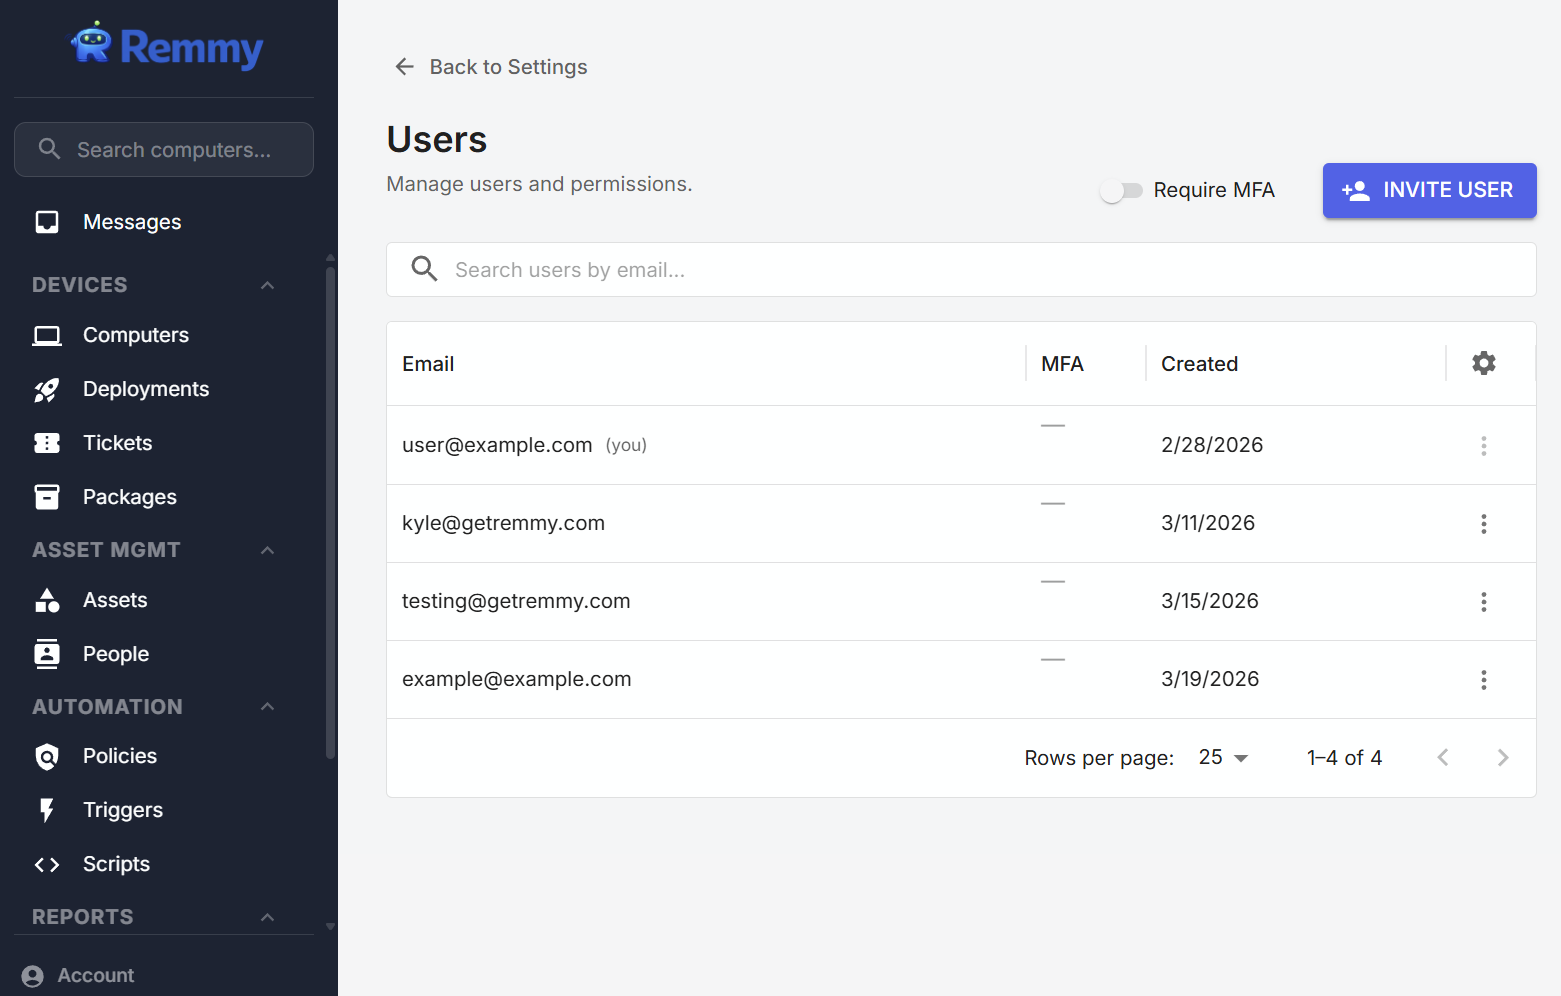
Remmy supports a multi-user environment, where multiple sysadmins can work together to manage computers. Administrative users can add new users, or remove users all through the User management page.
Viewing users
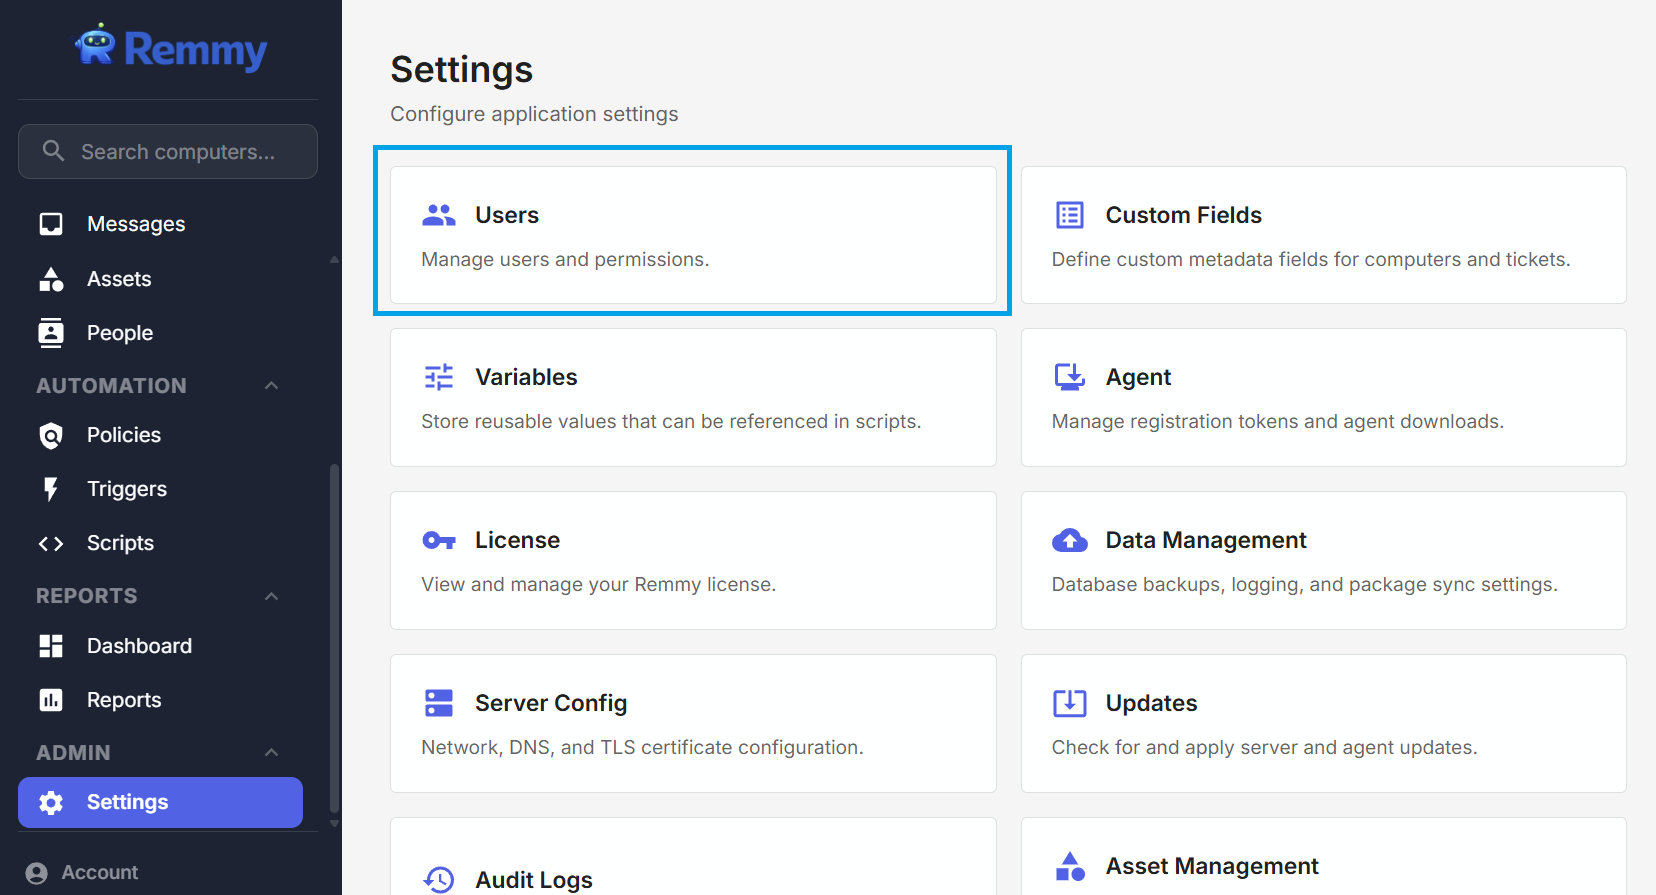
To view and manage users on the account, an administrative user clicks the Settings main sidebar navigation item, and from the settings page clicks the "Users" setting tile.
Inviting new users
To invite a new user to manage computers through Remmy, a user with the elevate permissions can go to the Users page, click the Invite User button, enter an email address, and create an invite. Because Remmy is a self-hosted application, Remmy does not automatically send the invitation to the target user. The administrator sends the "Invite Link" to the target user, who can then use the link to create their login to Remmy.
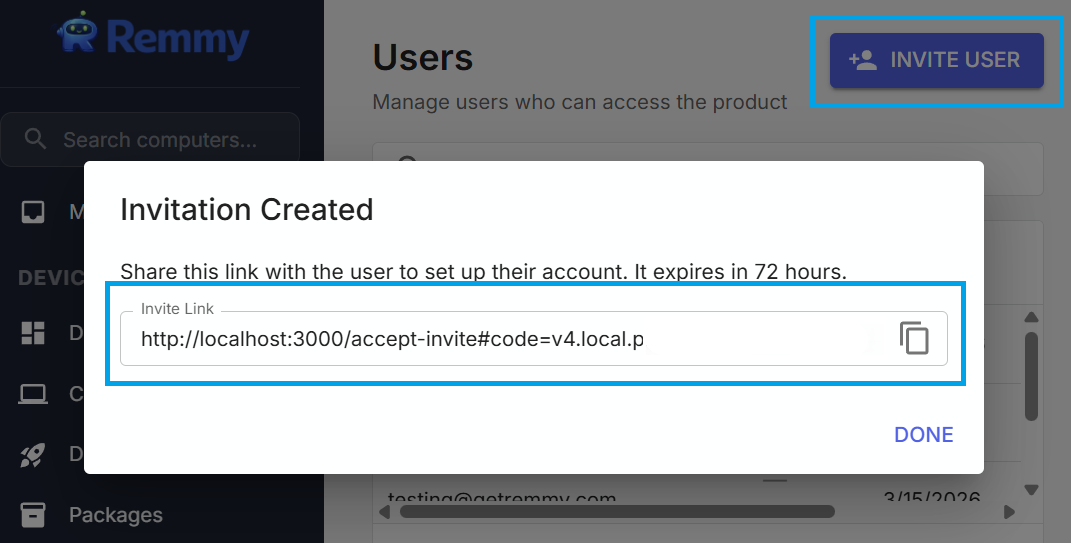
NOTE: Providing the Remmy invitation link to a user does not automatically give them access to the server that Remmy is configured on. Administrator users need to grant access to the server that Remmy is hosted on for a user to access Remmy.
Removing users
Users can be removed by clicking on the action dots, and then selecting Remove User. When a user is removed, their access to Remmy is immediately revoked. All objects created by that user remain in the system, including in logs, ensuring no service disruptions or lost logging when a user is deleted.
If a user is accidentally deleted, they can be restored by being invited again with the same email address.
User permissions
Users are granted permissions on a per-user basis. When a user is created, they are given full access to all objects and actions. Before sharing the invite link with a new user, be sure to audit and configure the user permissions on the user. See article on user permissions.